
Sometimes a customer has a use case where they are copying VM files from one location to another. This can sometimes lead to issues that are not apparent immediately. One example: I had one customer where a VM was copied to several remote sites, and this wasn’t causing a problem at first sight, but when licensing was turned on and the VM’s tried to register it became a problem because they all had the same identifiers.
Because the way that vCenter/ESXi treat this phenomenon varies depending on the steps you follow, I wanted to do a small deep dive on what and how to check VM identifiers. These examples are on CentOS so some of the commands may need to be adjusted, but they apply to other OS’s as well.
First we want to get familiar with what UUIDs are. This KB talks about them, where they are stored and what you can do with them depending on what you want to accomplish:
https://kb.vmware.com/s/article/1541
Derek Seaman had shared a PowerCLI snippet to do manual UUID manipulation, if you find yourself in need to change them in an automated manner:
https://www.derekseaman.com/2010/10/making-your-vmware-vm-uuids-unique.html
However, I’m hoping with this blog post you can avoid having identifier problems in the first place.
Too long, didn’t read
After this section I do some tests and scenarios that highlight different situations. The TL:DR conclusion is:
Once you have copied the VMDK files to your new location, ensure you add the VM to vCenter by registering the VM, and then either:
- a) Convert the imported VM to a template and deploy from that template, which also has the advantage of being able to re-create the machine easily if you need it again in the future, or
- b) Use the “Clone” feature to create the new VM from that VM you copied.
The steps above force your vCenter to track mac and UUIDs; as you will in the examples below, not doing so doesn’t allow vCenter to “initialize” or “individualize” the VM. However, that does not completely change all identifiers in a VM, and preparing an image is also good practice for other identifiers, as we will see in the examples.
Here’s some scenarios of how mac/uuid/image properties can change:
I made a fresh minimal install CentOS VM from the CentOS7 iso, and got the UUID from the command line to compare later
[root@new-host-3 ~]# dmidecode | grep -i uuid
UUID: 8f543b42-942e-3ed6-0712-28eb45b251f7
Then I just did “yum update”, and “shutdown now”. I did not prepare anything in this image to make it a real template.
First test - CLONING
I cloned the machine twice and checked mac, uuid and ssh key. Notice how we can run into some problems:
centos7clone
[root@new-host-4 ~]# dmidecode | grep -i uuid
UUID: e8d33b42-7e9a-b762-accc-03e441973f9a – different! ☑️
SSH-ed25519 8f:00:be:46:35:8b:09:6e:be:00:58:0c:71:d3:ba:66 – ⚠️this is the same as the other clone!⚠️
ethernet mac 00:50:56:bb:73:dd – different! ☑️
centos7clone2
[root@new-host-6 ~]# dmidecode | grep -i uuid
UUID: 21a53b42-c995-59d9-1016-d5e09db04b63 – different! ☑️
ssh-ed25519 8f:00:be:46:35:8b:09:6e:be:00:58:0c:71:d3:ba:66 – ⚠️this is the same as the other clone!⚠️
ethernet mac 00:50:56:bb:87:c6 – different! ☑️
Notice 3 things here
- vCenter does change UUID
- vCenter does change MAC address
- vCenter does not change SSH public key
vCenter makes the machine unique - even if you don’t ask it explicitly to do it - as long as it’s aware of the source and destination file locations. It knows they are different VMs and keeping the same MAC and UUIDs would cause a conflict, and so it changes them as part of the Cloning operation.
Second test - simulate copying a VM to a remote site
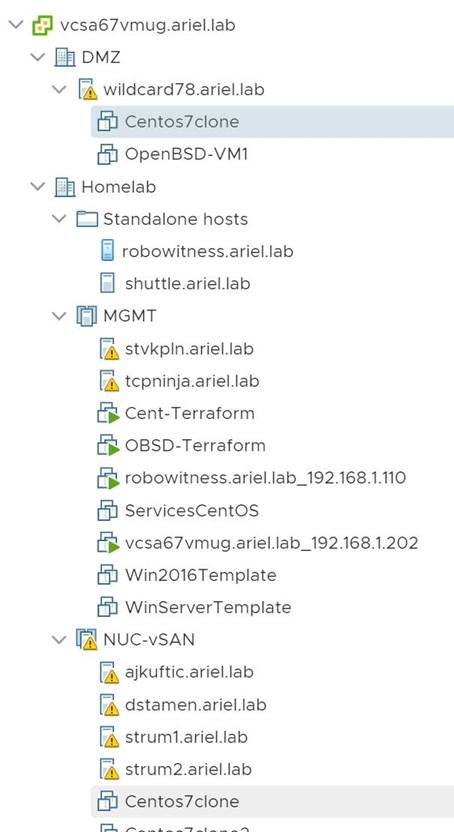
I grabbed centos7clone and downloaded it to my machine. I had to do it with WinSCP, I had errors after downloading the results as a CentOS7clone.zip file and re-uploading it in the html5 client – the VM couldn’t find its disk. I’m hoping this is similar to what people copying VMs to remote locations are doing.
I opened a new datastore in the same vCenter, but in a different virtual datacenter and cluster, to simulate a common configuration for a remote site and uploaded the VM as a folder. When I turned this VM on it didn’t ask me if I had moved or copied it - that was unexpected. If it’s not asking this question I can understand how it can lead to issues.
Here’s the results:
New centos7clone, uploaded to different vCenter
[root@new-host-8 ~]# dmidecode | grep -i uuid
UUID: e8d33b42-7e9a-b762-accc-03e441973f9a – ⚠️same! This is a problem!⚠️
ssh-ed25519 8f:00:be:46:35:8b:09:6e:be:00:58:0c:71:d3:ba:66 – ⚠️this is the same as the other clone as well⚠️
ether 00:50:56:bb:ab:47 – different! ☑️
centos7clone, the original
[root@new-host-4 ~]# dmidecode | grep -i uuid
UUID: e8d33b42-7e9a-b762-accc-03e441973f9a – ⚠️same! This is a problem!⚠️
SSH-ed25519 8f:00:be:46:35:8b:09:6e:be:00:58:0c:71:d3:ba:66 – ⚠️this is the same as the other clone as well⚠️
ether 00:50:56:bb:73:dd – different! ☑️
We can see that downloading and re-uploading the VM doesn’t trigger the vCenter to re-initialize this VM. It tracked the MAC address and changed it, but since it doesn’t try to initialize the VM - no dialog asking if you moved or copied- then you can have the same UUID show up in another VM at the same time in your company, simply because different vCenters can’t coordinate.
It is better that once the VM has been added to another virtual datacenter or another vCenter you clone it or create a template from it. Above we proved that as long as the operation is inside vCenter, it does reset the UUID and MAC for the new VM. I tested his by making a clone of the VM at the remote site and checking the identifiers again:
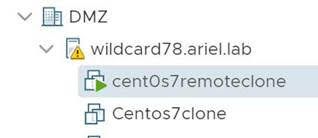
centos7remoteclone
[root@new-host-9 ~]# dmidecode | grep -i uuid
UUID: 294c3b42-37b6-f7d3-da2e-b8776a21c845– different! ☑️
ssh-ed25519 8f:00:be:46:35:8b:09:6e:be:00:58:0c:71:d3:ba:66 – ⚠️this is the same as the other clone!⚠️ ether 00:50:56:bb:58:7b– different! ☑️
Important note on image preparation
The SSH key in the clones shows that I hadn’t properly prepared the template. Similar to windows and the sysprep command, there are ways to force a linux template to regen all it’s identifiers. I googled and quickly found a post explaining how to prepare an image for a vSphere template. SSH key is just the tip of the iceberg, the preparation even recommends removing UUID references from the OS, old log files, shell history, etc.
https://community.spiceworks.com/how_to/151558-create-a-rhel-centos-6-7-template-for-vmware-vsphere
Here’s an example of how image preparation did change the SSH key. I followed the steps in one of those links and transformed the centos VM into a template. I created two VMs from template:
CentOS7fromtpl
[root@new-host-5 ~]# dmidecode | grep -i uuid
UUID: 53c63b42-4822-a08e-0316-888398135a75 – different! ☑️
SSH-ed25519 2b:6d:ac:db:04:c0:5a:fe:f8:ab:c7:76:fc:da:71:e8 – different! ☑️
ether 00:50:56:bb:f0:20 – different! ☑️
CentOs7fromtpl2
[root@new-host-7 ~]# dmidecode | grep -i uuid
UUID: 54d83b42-24ba-6885-c150-54a64e299101 – different! ☑️
ssh-ed25519 73:77:bf:a5:b4:43:cb:79:ca:b3:27:fb:9e:6c:26:70 – different! ☑️
ether 00:50:56:bb:4e:04 – different! ☑️
Hope this all helps!
best,